搭建本地运行环境 完成之后,就可以将源码推送到远程仓库进行托管了,托管了之后就可以直接访问网站了,我选择的托管平台是 Github。
整个流程是这样的,先创建3个代码仓库:
hugo-blog-code私有仓库,存放网站的源代码ludard.github.io公有仓库,源码仓库编译生成好的博客网站comments-for-blog博客的评论系统
这样将网站的源码和内容进行了公私分离,既保护了源码的私密性,又保证了博客内容的简洁性。
仓库调用顺序和关系:
- 本地代码调试好了之后提交到
hugo-blog-code私有仓库,保证源码不外泄。 hugo-blog-code仓库配置Github Action Workflow生成并编译成网站,然后发布到ludard.github.io公有仓库ludard.github.io仅存放博客内容,负责对外展示和访问comments-for-blog仓库存储用户评论,和ludard.github.io仓库相绑定。
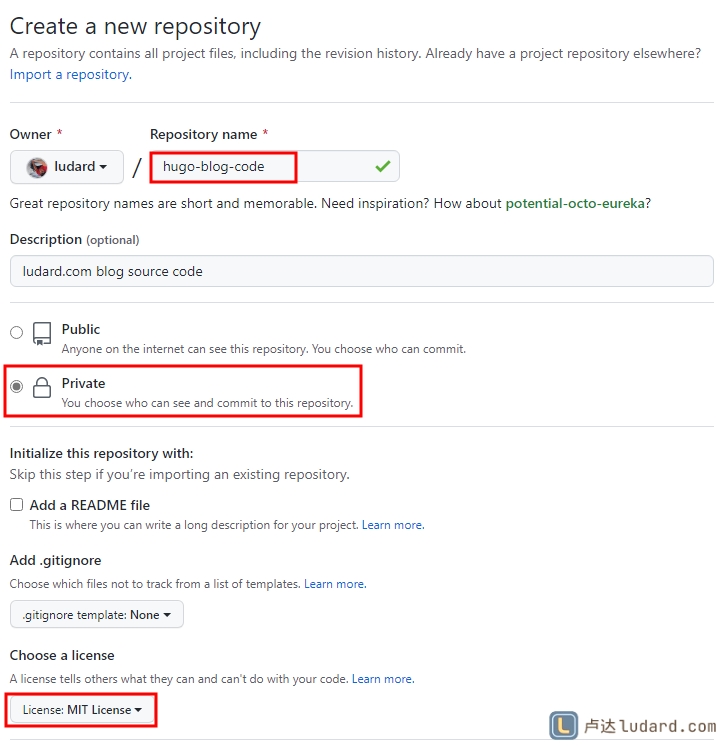
创建源码私有仓库
- 在
Github新建New Repository
创建完成之后复制仓库的地址:
git@github.com:ludard/hugo-blog-code.git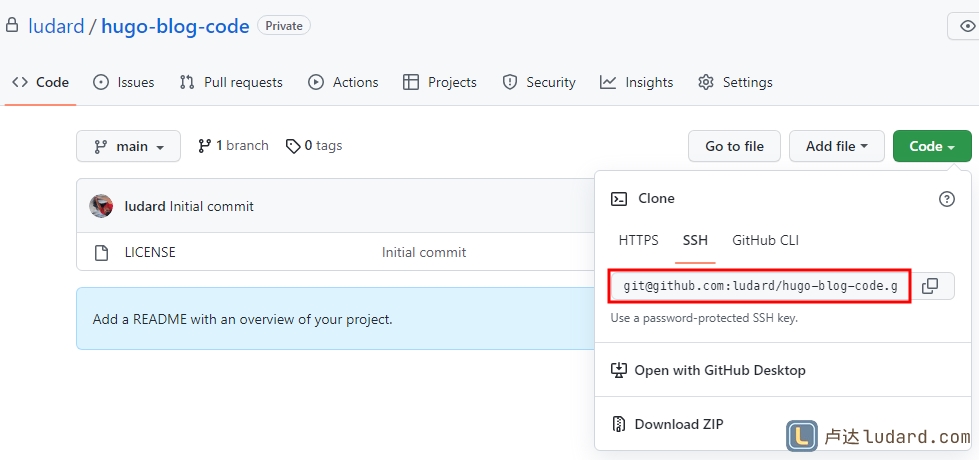
打开
Git bash,切换到博客所有目录,按下列命令将博客源码提交到私有仓库:注意:在本地目录使用命令
git init初始化时,默认分支名称是master,而 github 仓库默认分支是main。如果推送报错:error: src refspec main does not match any. error: failed to push some refs to ‘git@github.com:ludard/hugo-blog-code.git’

说明本地仓库和远程仓库分支名称不一致造成的。有两种解决办法:
强制推送
git push --force不推荐将本地仓库分支重全名,和远程仓库分支一样:
git branch -m oldBranchName newBranchName按以下步骤解决:
执行
git clone git@github.com:ludard/hugo-blog-code.git将远程仓库下载到本地将本地源码内容复制合并到
hugo-blog-code目录切换到
hugo-blog-code目录,此时分支名称就是main了依次执行以下命令:
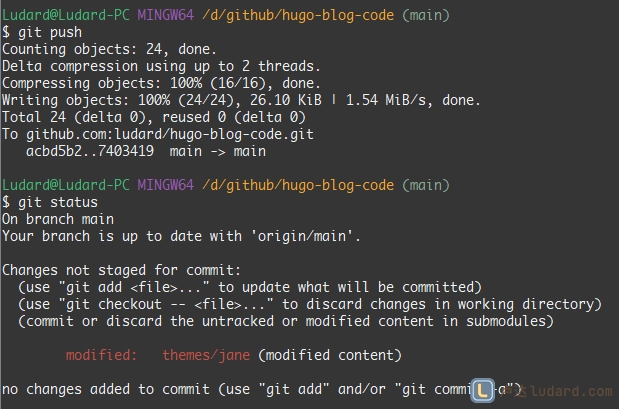
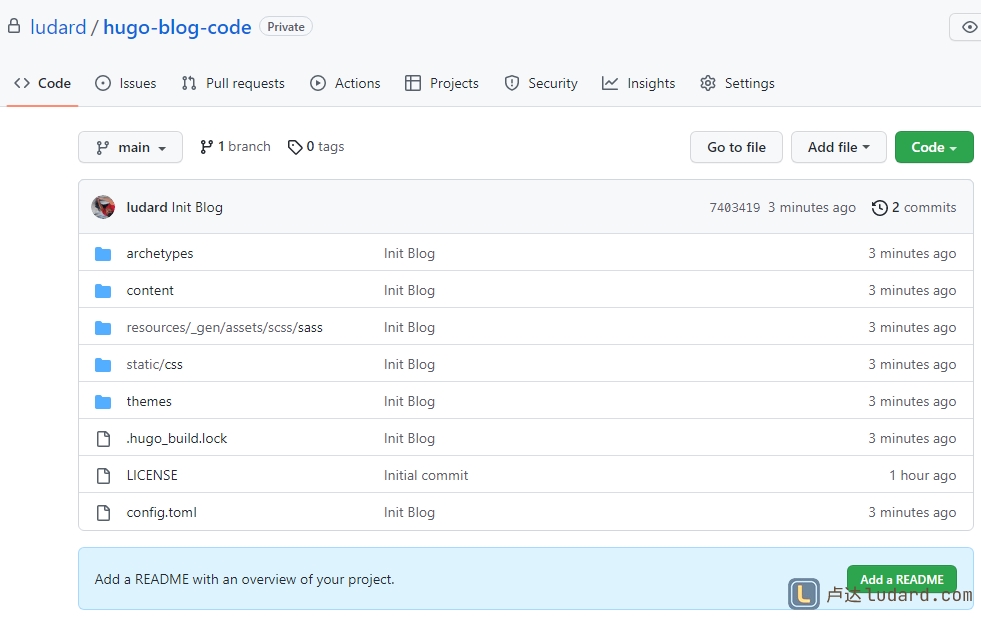
查看 hugo-blog-code 仓库,源码已经提交了
创建博客公有仓库
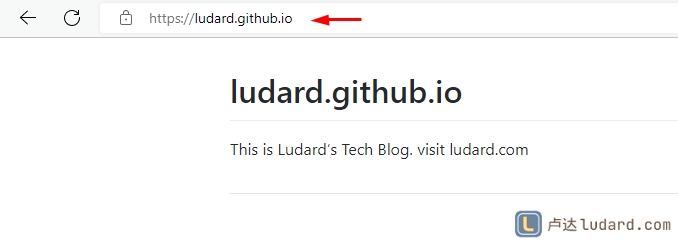
打开 Github 个人主页,新建 New Repository,仓库名称是 ludard.github.io
注意,这个公开仓库有2点需要注意:
- 仓库名称有固定的格式,用户名
ludard+.github.io。一个用户名仅能创建一个这样的仓库,创建好之后就可以直接作为博客使用了。博客域名就是https://ludard.github.io- 一定要是公开仓库,因为这个博客是供对外访问的,如果私有就无法访问了

创建好之后,就可以将仓库名称作为网址访问了
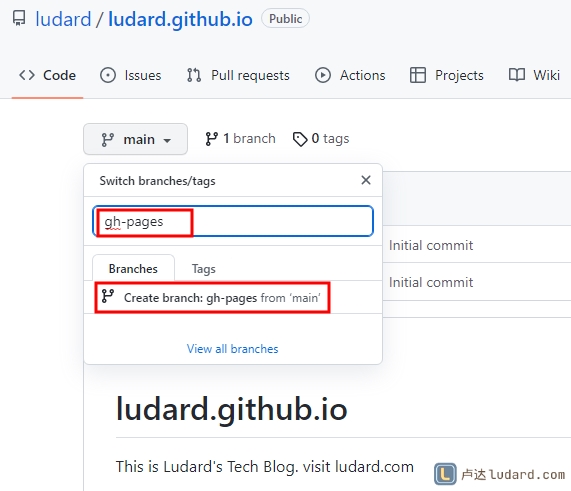
新建博客内容分支
创建好仓库后再创建一个分支专门用来接收从私有仓库推送过来的博客内容, 这样主分支看起来简洁一些。
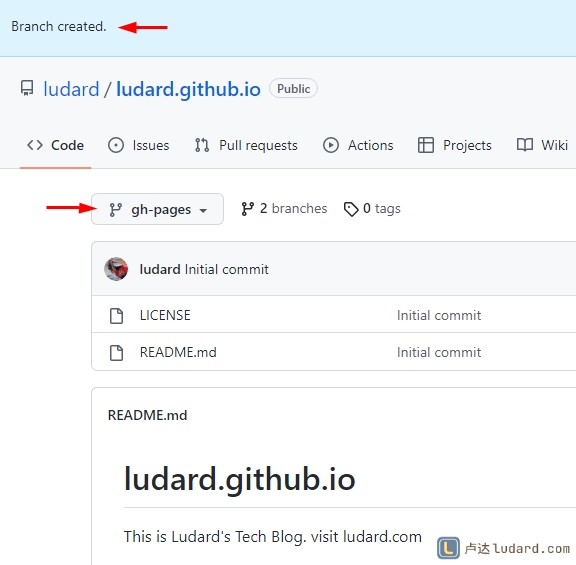
打开 ludard.github.io 仓库,点击 main 主分支,搜索 gh-pages 分支,如果没有就点击 Create branch 创建分支
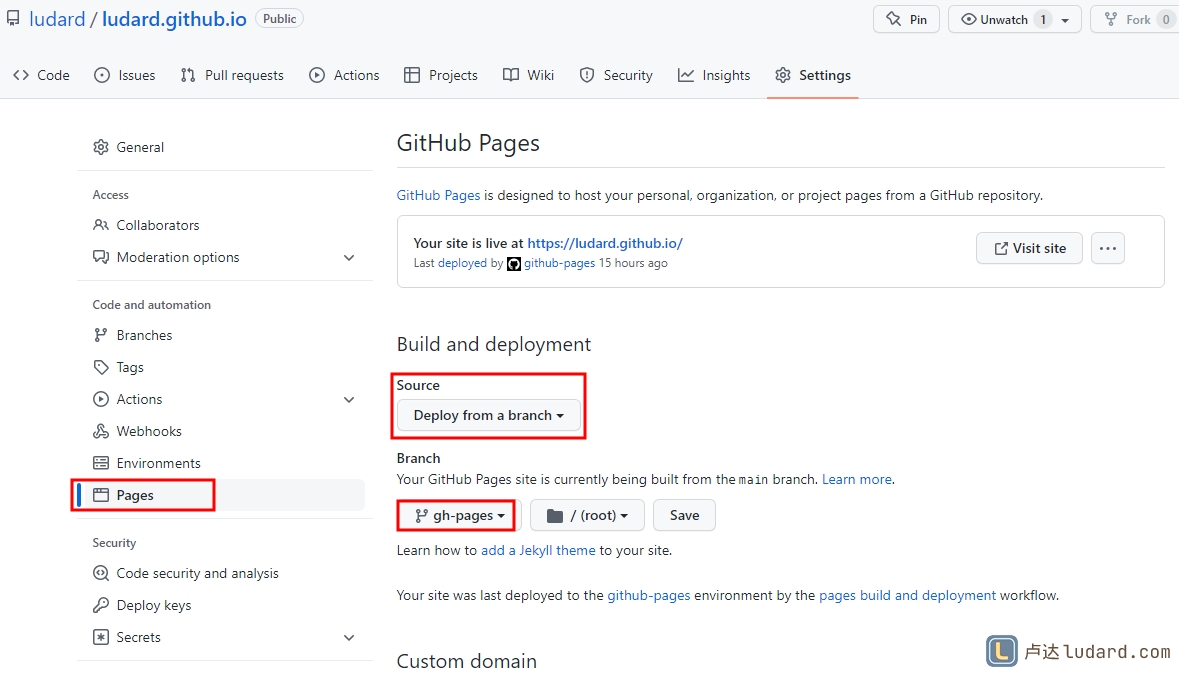
再打开仓库的 Settings 设置 -> Pages,Source 选择 Deploy from a branch,Branch 选择 gh-pages,然后点击 Save 保存
创建 PAT 配置私库连接公库
Personal Access Token(PAT) 创建PAT的主要目的是授权给私有仓库访问写入目标仓库的权限,可以让私有库的actions推送构建好的代码到目标仓库。
PAT 有两种级别:
- 全局 可以访问所有仓库。在个人账户页面配置,Profile Photo -> Settings -> Developer settings -> Personal access tokens -> Generate new token
- 仓库级 只能访问一个仓库,在被访问仓库的
Deploy key创建
因为推送是从 私有仓库 hugo-blog-code 推送到 公有仓库 ludard.github.io,所以需要在 ludard.github.io 仓库上配置 Deploy key 供 hugo-blog-code 访问,在 hugo-blog-code 仓库上配置 Action 负责编译推送代码。
创建Deploy key
配置 Deploy key 需要 SSH Key,所以先生成密钥对。
- 打开
Git bash,创建密钥对:
| |
备注:
ssh-keygen -t rsa -C "ludard@outlook.com"创建密钥,邮箱必须与Github账户邮箱一致Enter file in which to save the key密钥文件名称和位置Enter passphrase密钥的密码,每次连接仓库时都需要输入验证密钥的密码一定要为空,我因为这个问题查了一天资料,最后才想通在自动化时不能输入也没法配置代理,所以一直无法推送到公有仓库。
更多密钥类型可以参考官方文档 generating-a-new-ssh-key

执行成功后会在 Enter file in which to save the key 目录下创建2个文件:blogkey 和 blogkey.pub,其中 blogkey 是私钥,blogkey.pub 是公钥。如果只输入了文件名称没有目录,又在用户目录执行,所以这2个文件就在用户目录下,也就是 C:\Users\Ludard 目录。
打开
ludard.github.io公有仓库 ->Settings->Deploy keys->Add deploy key密钥管理可以参考官方文档 managing-deploy-keys
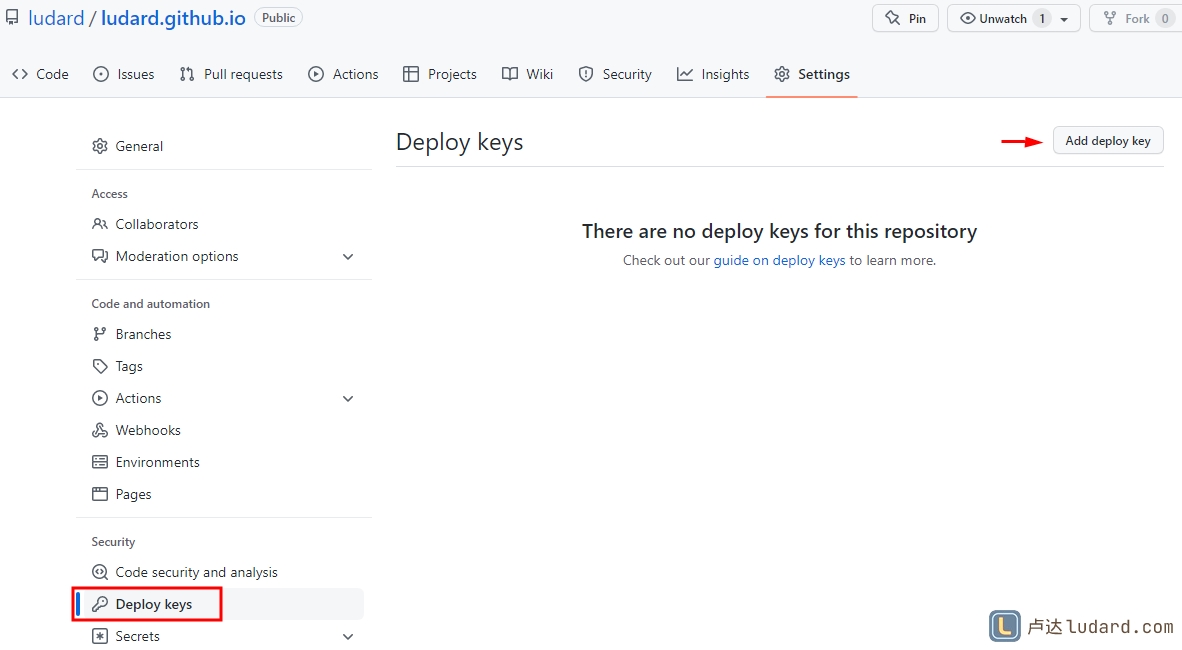
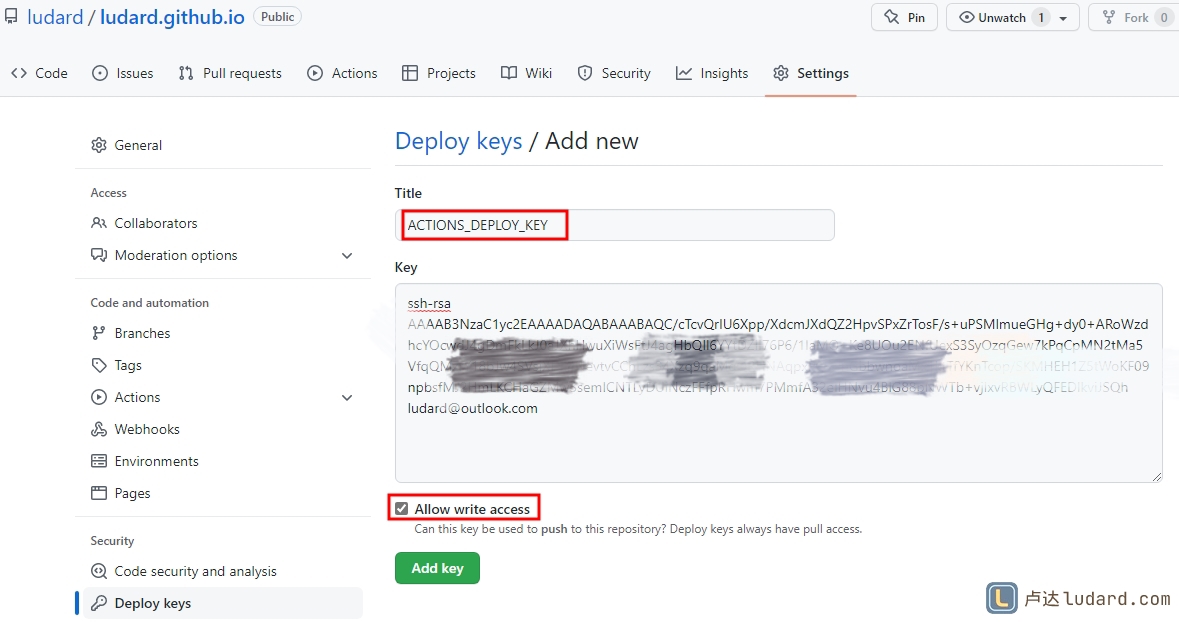
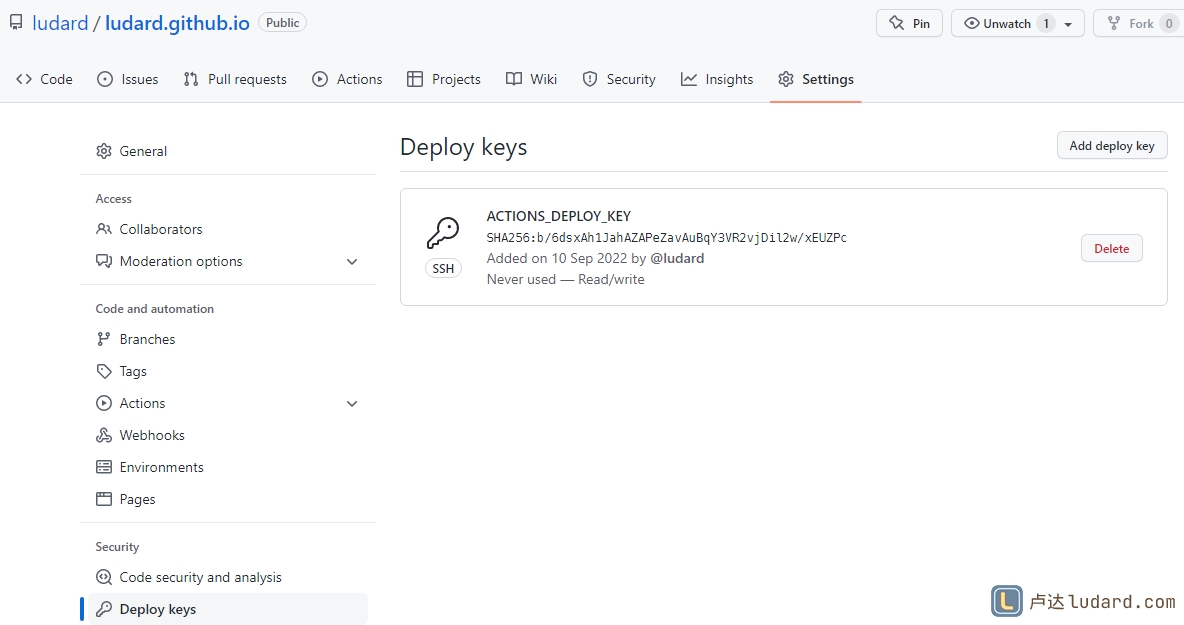
Title密钥名称填写ACTIONS_DEPLOY_KEY(这个名称有私库配置公钥时还要用到),Key填写blogkey.pub公钥文件内容。注意要勾选下面的Allow write access给予访问权限。注意:
- 如果担心手动复制有空行或其它问题,可以使用命令
$ clip < .ssh/blogkey.pub和$ clip < .ssh/blogkey复制到系统粘贴板再粘贴到网页文本框 Key可以使用公钥内容,也可以使用key fingerprint,也就是SHA256:On4M4m... + 邮箱- 配置
Deploy key完成时需要 Github 账户密码验证
- 如果担心手动复制有空行或其它问题,可以使用命令
打开
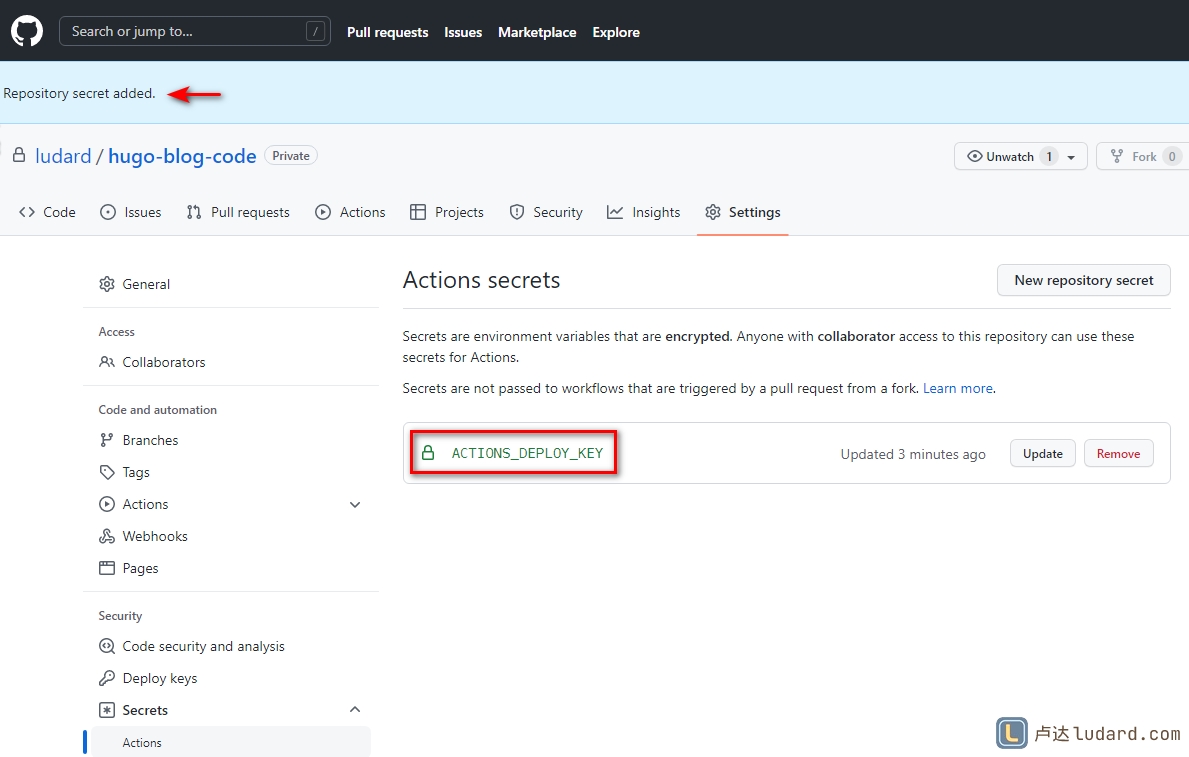
hugo-blog-code源码私有仓库 ->Settings->Secrets->Actions,再点击New repository secret按钮新建密钥
密钥名称和
PAT一样填写ACTIONS_DEPLOY_KEY(这个名称就是SECRETNAME,在配置Workflow yml时还要用到),Secret填写blogkey私钥文件的内容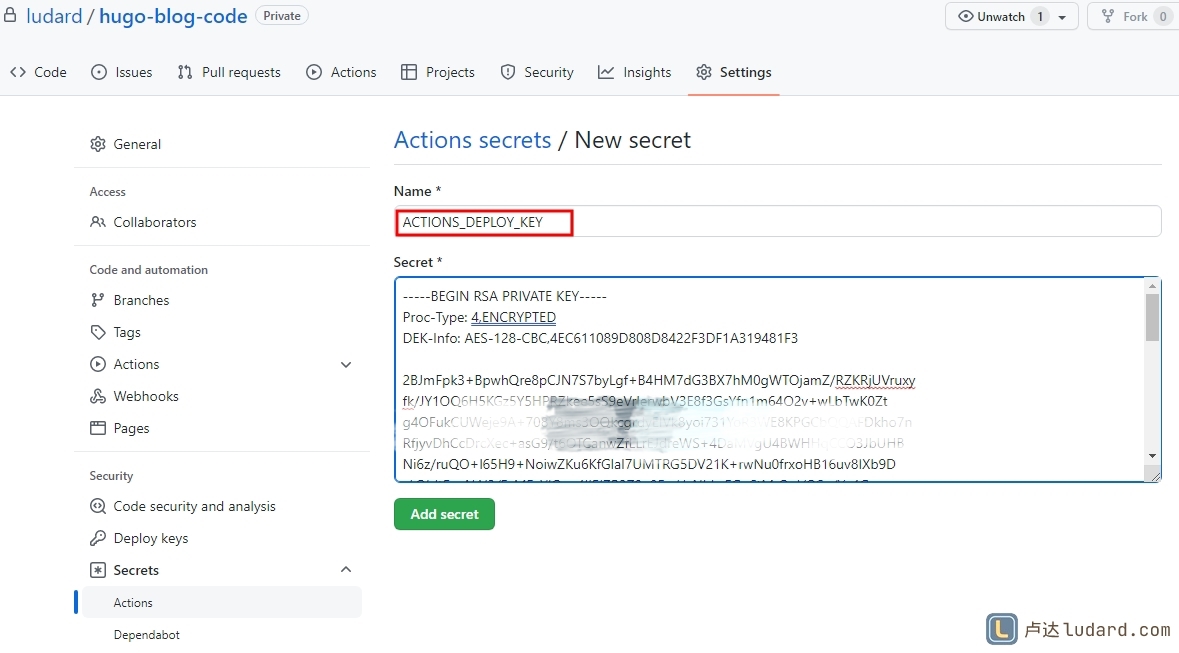
配置 Github Action Workflow
从私有仓库编译推送到公有仓库
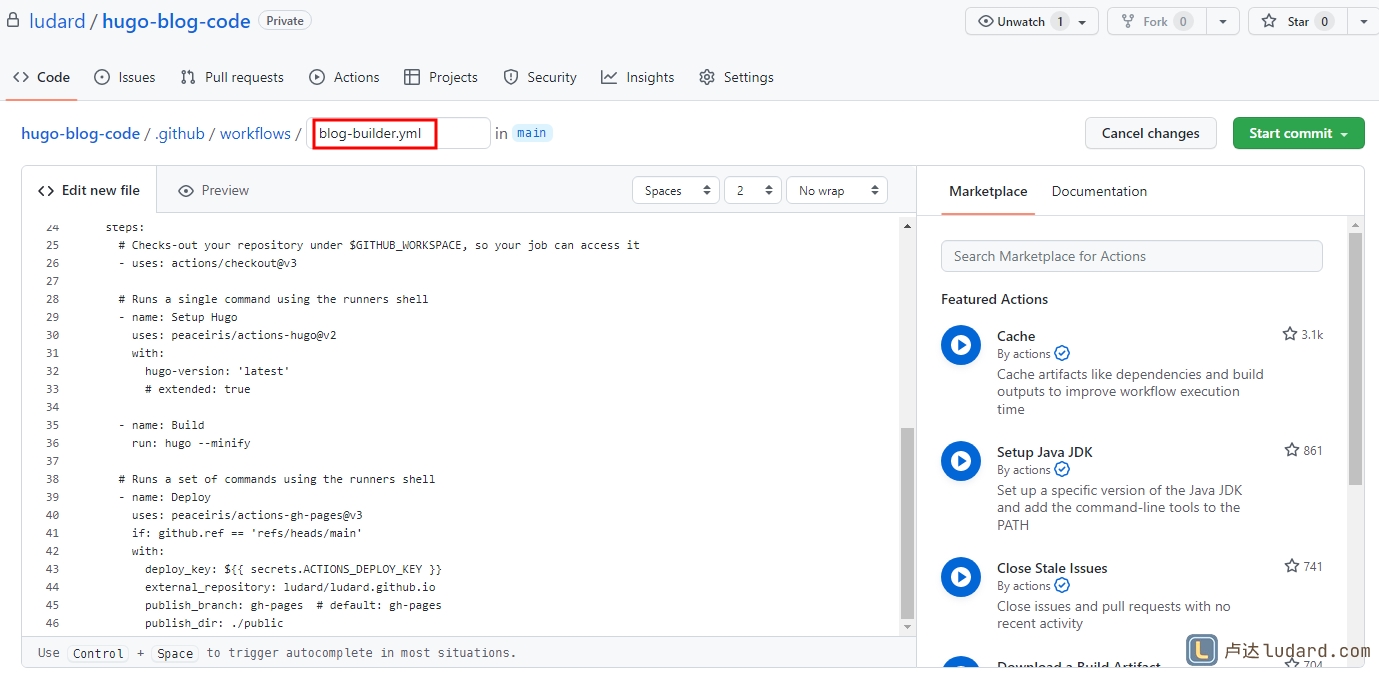
Github Action Workflow yaml包括如下几个部分:
Checkout拉取源码Setup Hugo编译Hugo博客Run Hugo构建网站,生成内容Deploy用GitHub Pages Deploy Action将网站内容发布到目标仓库
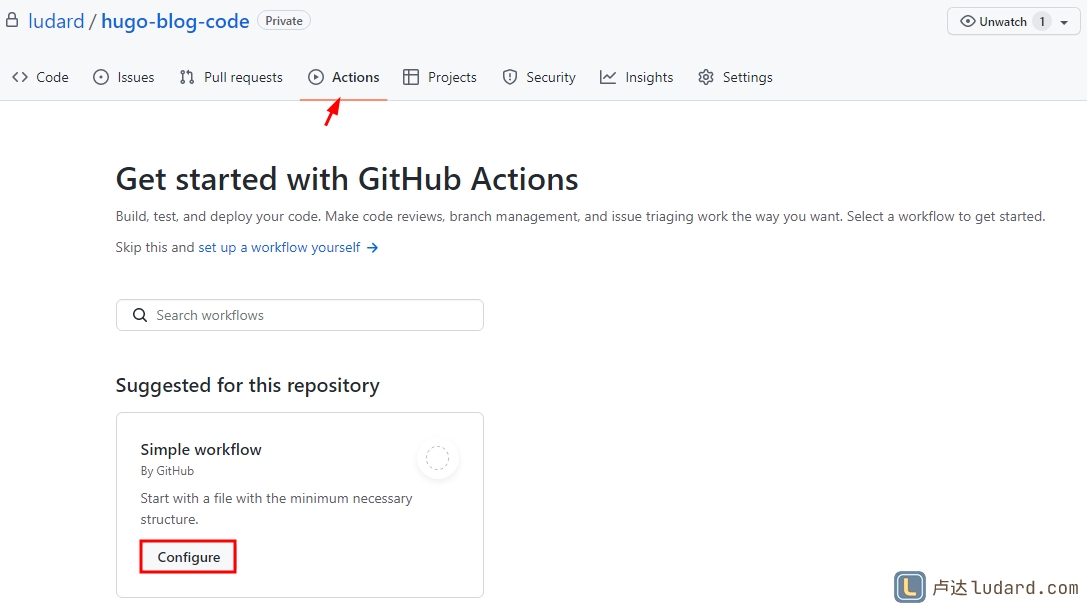
在 hugo-blog-code 私有仓库打开 Actions 页面,然后再打开 Simple workflow 的 Configure 进入配置面。
更多
Github Actions语法可以参考 GitHub Pages action
| |
编辑好配置后点击页面右边按钮 Start commit 输入文件名称的描述,再点击 Commit new file 保存工作流配置文件。
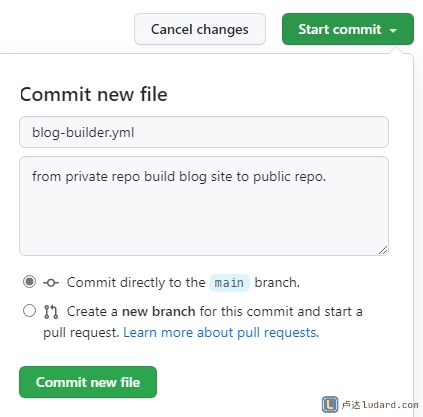
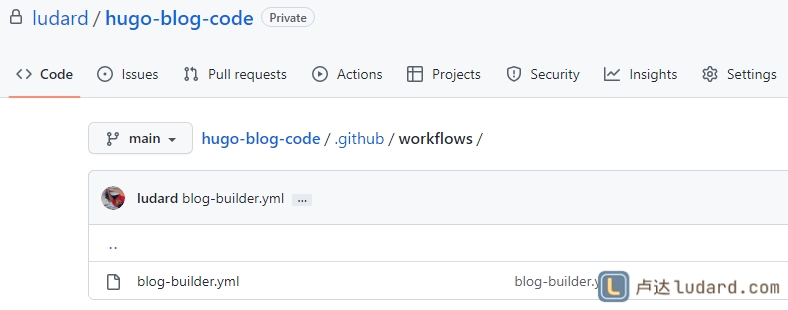
保存后,在项目目录下会多了一个 .github/workflows/blog-builder.yml 的文件
然后 hugo-blog-code 仓库接收到代码后 Action Workflow 就会自动运行部署
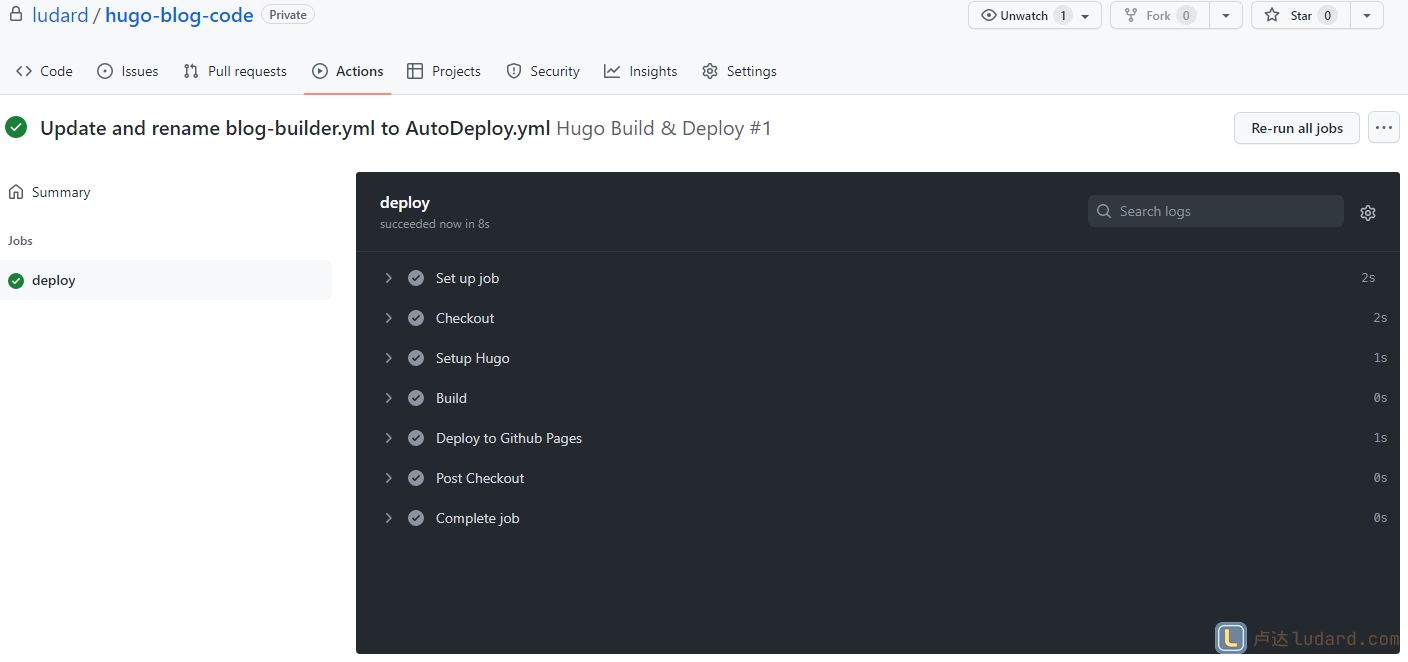
等待运行完成再打开 ludard.github.io 仓库就可以看到博客内容已经推送过来了
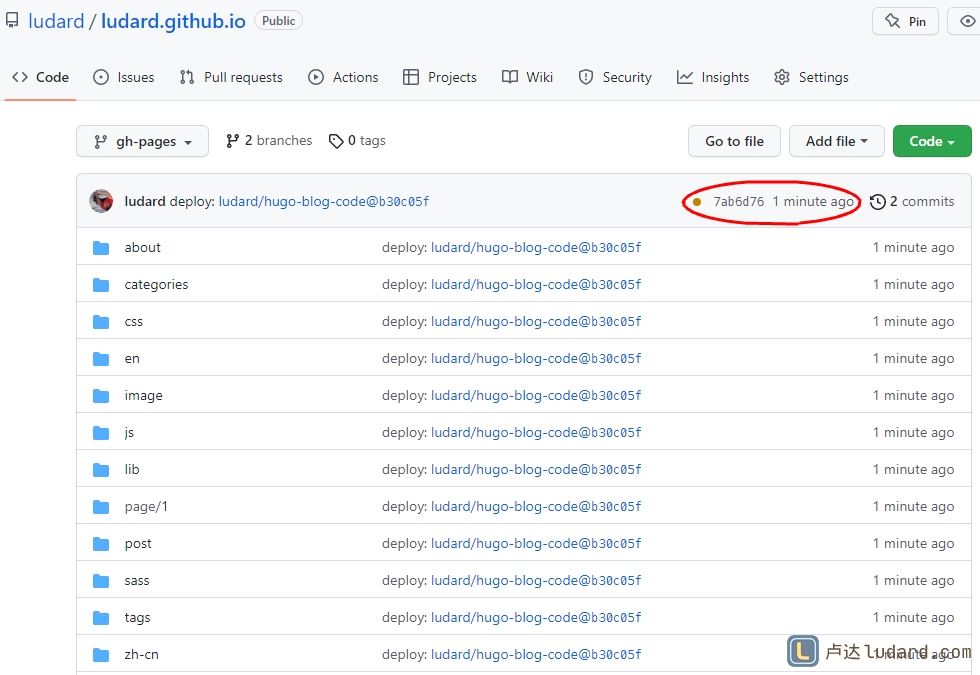
再等待仓库的状态变成绿色就可以打开网址 https://ludard.github.io ,看到最新博客内容了
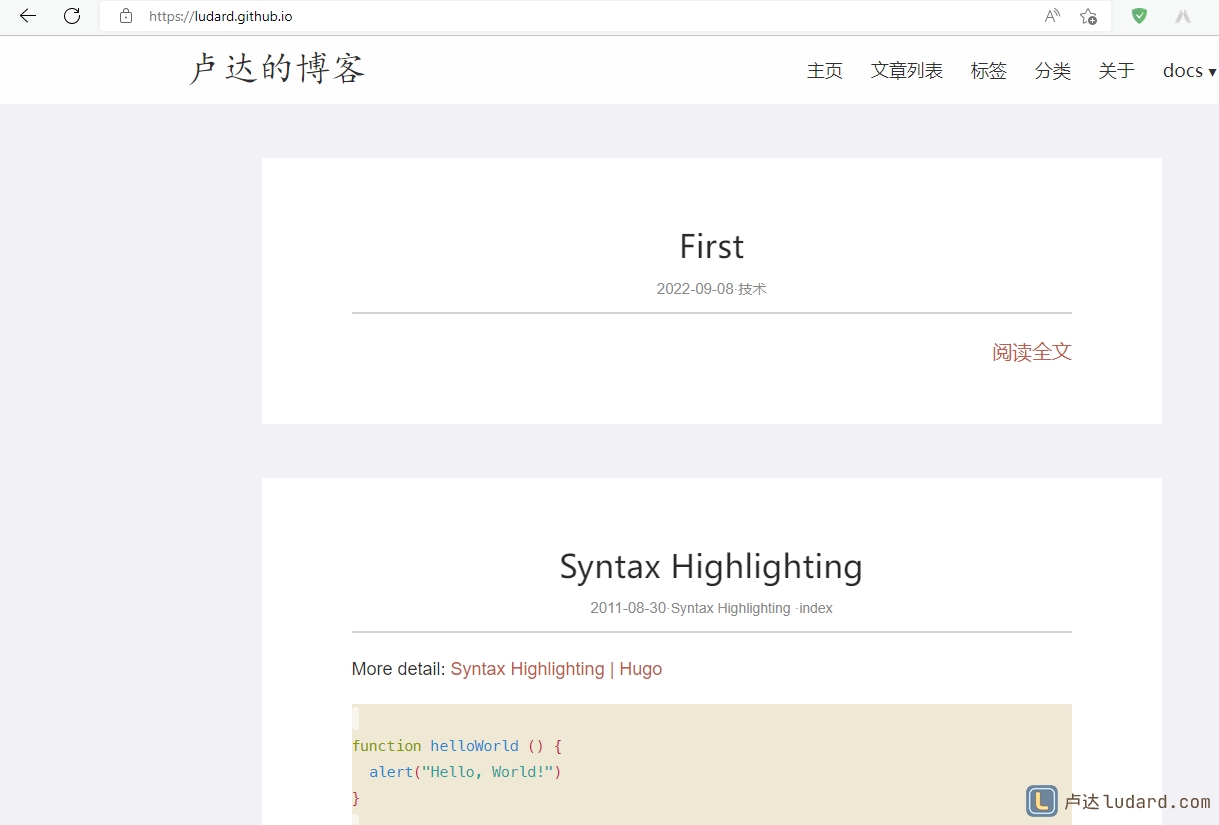
如果没有自已的域名,使用 https://ludard.github.io 域名就可以创作使用了。